This blog will cover my first experience setting up and boardcasting a live stream as part of the Video Streaming & Display Technology module at the University of Derby conducted by the legendary Ben Sams. Before we head into the exciting details associated with a live stream we need to understand the basic principles behind, in front and to the side of streaming.
A live stream in basic terms is the transmission and receiving of live video or even audio content over the internet (Thinkuknow.co.uk, 2018). The history of streaming doesn’t go back as far as you think with the earliest official record being 1995 where a New York Yankees game was boardcast live using RealNetwork by Microsoft which prompted the creation of RealPlayer streaming plugins. This being said there is an earlier notation of streaming in 1993 by Xerox PARC when engineers decided to try out some new boardcasting technology and by happy accident ended up boardcasting live over the internet (Mason, 2017).
An example of streaming services are Periscope, Facebook Live, UStream or a classic YouTube Live gaming stream of Call of Duty by SocialChaos79, whoever that might be! (Bell, 2017). The point being due to Richard Branston dishing out fibre and everyone else following suit as well as increasingly improved boardband speeds we can all actually receive and send a live video stream easily! This all being said a live video does not benefit from any kind of video editing after all it is of course live.
My first stream would be a simple upload to a private YouTube account using a website tool called YouTube Studio which is linked to a video player in this case VLC Player an open source platform. I was given a selection of video clips that were played and looped on VLC and then shared to YouTube Studio. A unique key was generated to lock the URL to my stream ensuring others could not send to my account. YouTube streaming address is the same address for everyone in the whole world so the generated streaming key is the only way to identify my stream from the masses. YouTube actually gives you some options to help best fit your stream and device. The first being ‘Simple’ designed for a mobile stream or webcam and ‘Customised’ for capturing content such as your desktop or from an external camera via capture card inside the computer. It details this as ‘best for gamers’ (Support.google.com, 2019).
The image above is an example of YouTube and YouTube Studio all in one beautiful capture (Youtube.com, 2019).
Okay, so I encountered some problems, the stream took place at the University of Derby and unfortunately they have strict firewall both internally and externally which prevented some of us actually streaming as well as problems setting up a YouTube account due to instant streaming restricts (IE my account had to be verified). I think actually a lot of this could have been avoided with better time management and preparedness on my part. I think in the future I might even give streaming a go on my PS4… Maybe Lego Harry Potter? Watch this space!
We have regrettably come to the end of an epic journey into video technology… Well at least I certainly thought so. During this time we have covered a number of topics exploring the various components related to video streaming as well as some useful information on video display technology. It is the skills and knowledge learnt in this module that has built up to the final challenge, The Tri-Wizard Cup!! Oh… No wait, wrong blog!
This final blog will cover all the elements previously investigated and put them into a practical assessment as part of a dedicated group to complete a live stream of a real live event. That’s right, No rehearsal and certainly no stopping to tape that cable down. It was completely live and streamed to the private educational YouTube account where a number of staff were eagerly watching just two floors away! I will aim to talk you through the ideal parameters when setting up a live stream, including lighting, filming techniques and ideal settings as well as actually explaining what we did and why we did it.
I will then give my own critical appraisal of the whole event and analyse the aspects which didn’t work or were completely overlooked. It is a big one but hang in there!
What are the stages of streaming an event? What is the best practice, the avoidable situation for each stage of the setup process. Well, firstly the room after all unless it is Sir David Attenborough, it is most likely to be indoors and ideally we want a well lit room with some natural and artificial lighting with our subject against a solid light natural coloured background. This helps us with our first term… Complex movement and encoders hate it. This term refers to area of a video with high movement that could exceed our bitrate limit and become taxing for our encoder and the end users device. Keeping a plain background and avoiding the outside world helps reduce this problem.
It just like keeping vision mixing transitions to a fast cut and not a slow complex detailed fade also reduces this high demanding data rate. We must also ensure any presenters or interviewees are dressed in plain, none stripy clothing again a bright but natural colour never goes a miss.
Multiple camera angle is a must, I mean can you imagine the Matrix from just a central camera angle? A back up camera with a wide shot is recommend as a quick go to if another camera goes down. It is ideal if this camera bi-passes the main mixer and goes straight to the streaming software.
The encoding must be at the highest quality and therefore the bitrate must be set to half of that of the wired internet connection bandwidth speed for the best results. CBR, Constant Bitrate but as part of the encoding to ensure good playback and viewing quality. H.264 is the most commonly used codec for HD digital video and a high profile is recommend to ensure the best quality up on upload, it’ll only get downgraded by a media server.
Audio should be captured using a microphone and mixing desk to ensure good balance of sound but then would be sent digital using a protocol like Dante to the streaming PC. A clap test would be complete to ensure good audio sync and delay applied where needed.
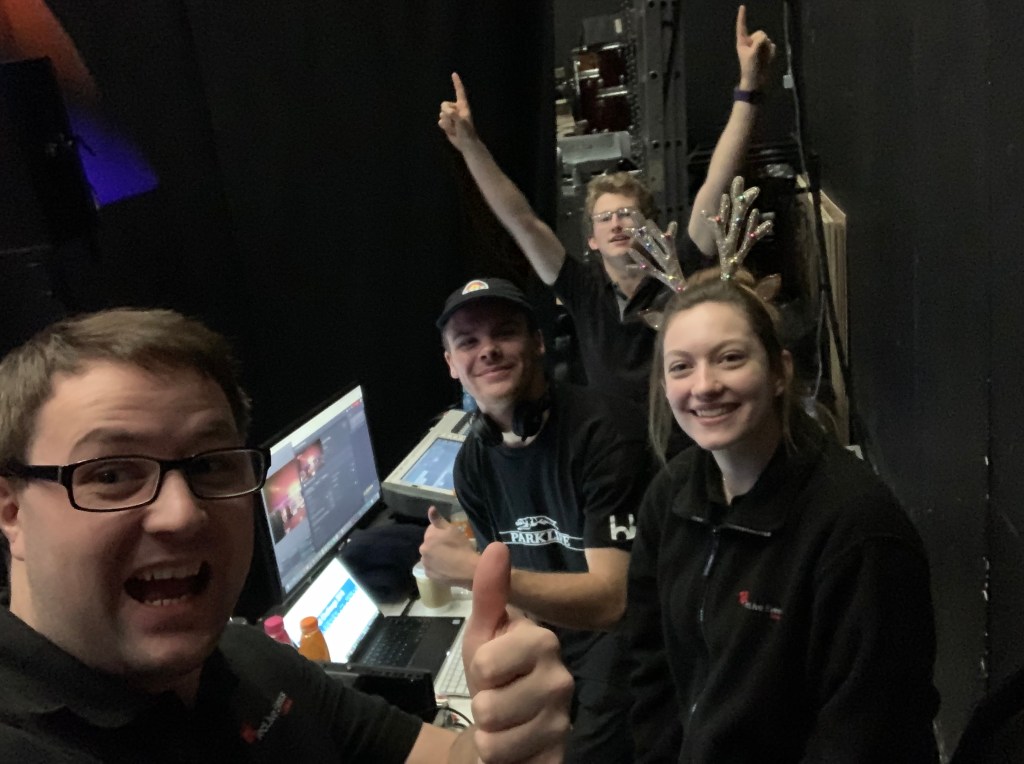
Down to the nitty gritty then of our live stream. The Open Boardcast Software application (OBS) was used to capture the incoming signal from Roland vision mixer using SDI 6G cabling to the Mac Pro onboard capture card. A wired internet connection was used with a back up cable ran ready with an additional 10GB of data hot spotting available on my iPhone, however no enquires with the phone company was made to ensure no capping for the day. The speed test on the day at the University basically broke the needle it shot up so fast! – Yes it was fast with no concerns over bandwidth after all I was confident I could probably stream most of ITV!
Two camera were setup to give different angle with one being a static wide shot of the board and to be used as a backup. The second and primary camera would be operated and give close up action shots while also covering the speeches from various team members and Dave Wilson. A recording was taken using SD cards directly from both cameras which would be edited by Kelvin at a later date. Both camera were linked to the vision mixer using high quality SDI 6G cabling. Due to the vision mixer not being compatible with 1080p all the cameras were set to 720p (Progressive) at 30fps.
We had a number of computers and at one point a sales assistant from PC World turned up enquiring whether we were buying or not. On a serious note some effort could have been made to condense these down so video files for the title scene and video footage in was coming through just Resolume before sending out to boardcast, it would have meant at least one laptop could have disappeared. It must be noted that this didn’t affect playback or the actual stream, just my OCD!
The video stream was encoded using H.264 using a high profile to ensure the best quality was sent to YouTube studio. It must be noted that YouTube uses adaptive streaming and will downgrade our original quality to ensure good playback on other devices which is why we need to ensure the best quality upload. The bitrate would have been set to CBR to ensure constant viewing for all users.
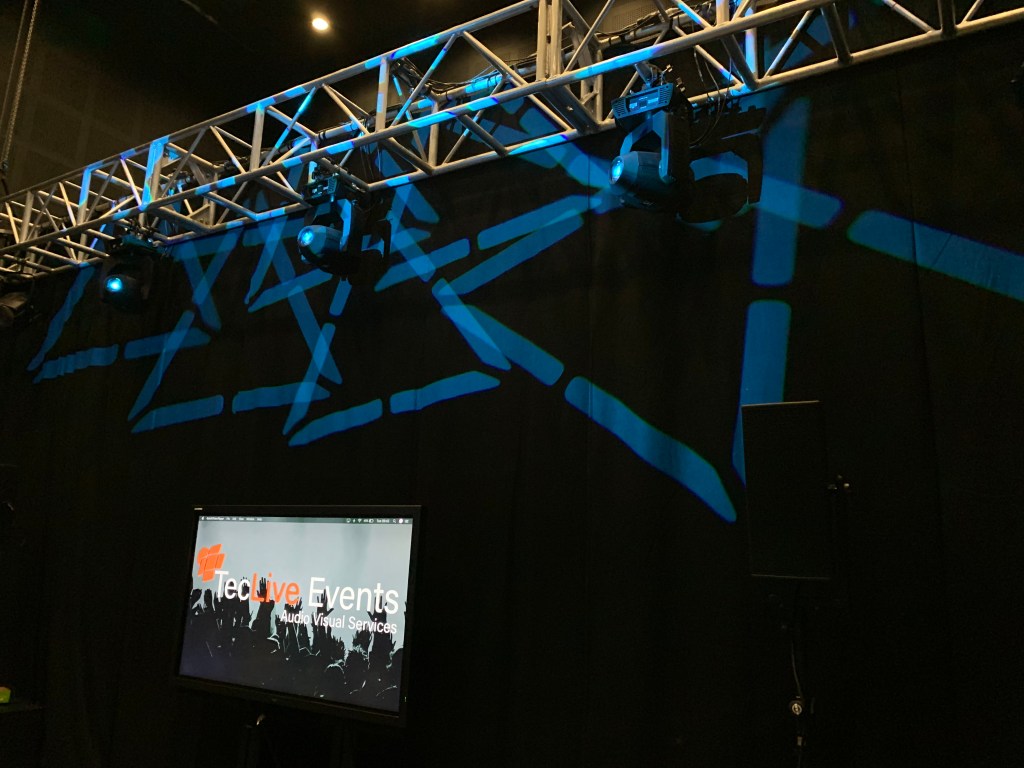
Lighting was programmed with the Derbot’s in mind and to ensure their perfect operation while on the board which was a serious specification for the event. This meant a darker room than what would have been preferred was used. Camera gain was used to boast contrast which resulted in a slightly degraded video image. We had a separate output to a large TV screen which allowed the audience to basically view the footage and video title as well as the scores. It worked really well but my only comment was this maybe should have had it own feed instead of sharing the stream feed, it meant the scoreboard was up when maybe we wanted the titles or Dave Wilson chatting away about blue LED’s. The Picture-In-Picture option on the Roland vision mixer saved the day with this little hiccup but again it is a small oversight and didn’t impact too much on the stream in my personal opinion. It was noted that at some point during the stream ‘Fade’ transition were used throughout which isn’t always ideal when encoding a life stream as previously mentioned, however scene with high motion for example following the Derbots around the circuit were ‘Cut’ transitions
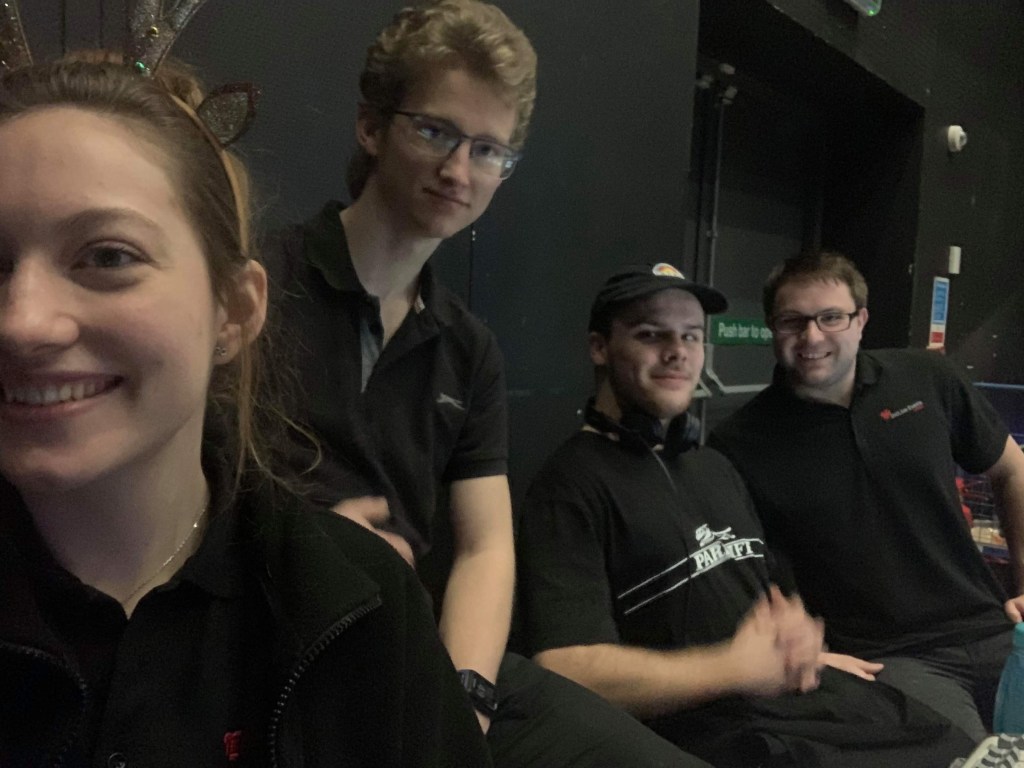
We have explored some excellent points as well as a number small oversights but it is time to address the elephant in the room. We had no audio, not even a whisper and to be honest a bit of white noise or feedback would have been far greater than complete silence. It is an oversight but the impact was costly and if this had been an Apple seminar well Steve Jobs would have arisen from the grave to hunt us all down. How was this overlooked? Planning, the saying ‘Fail to prepare, prepare to fail’ comes to mind with this one but okay we forgot the sound, excellent 1 minute in when someone starts talking we get it plugged in… Oh wait? No and why? Because nobody was actually monitoring the streams unload for problems and that could have been due to everyone having a job to do, whether vision mixing, live audio for the event, lighting, camera operation, whatever nobody had been assigned senior upload checker. Ben Sams quickly made us aware by which time we were in the full swing of the event. It is a disappointing situation as personally I felt the video side was excellent quality with no drop outs, great graphical titles and well filmed video footage.
A lesson well learned when it comes to live streaming and one which I imagine we will never make again. I think it shows the important of degree course like Video Streaming & Display Technology that make us realise the complex management and technical aspects that go into the content we watch so easily on our consistently present smartphones.
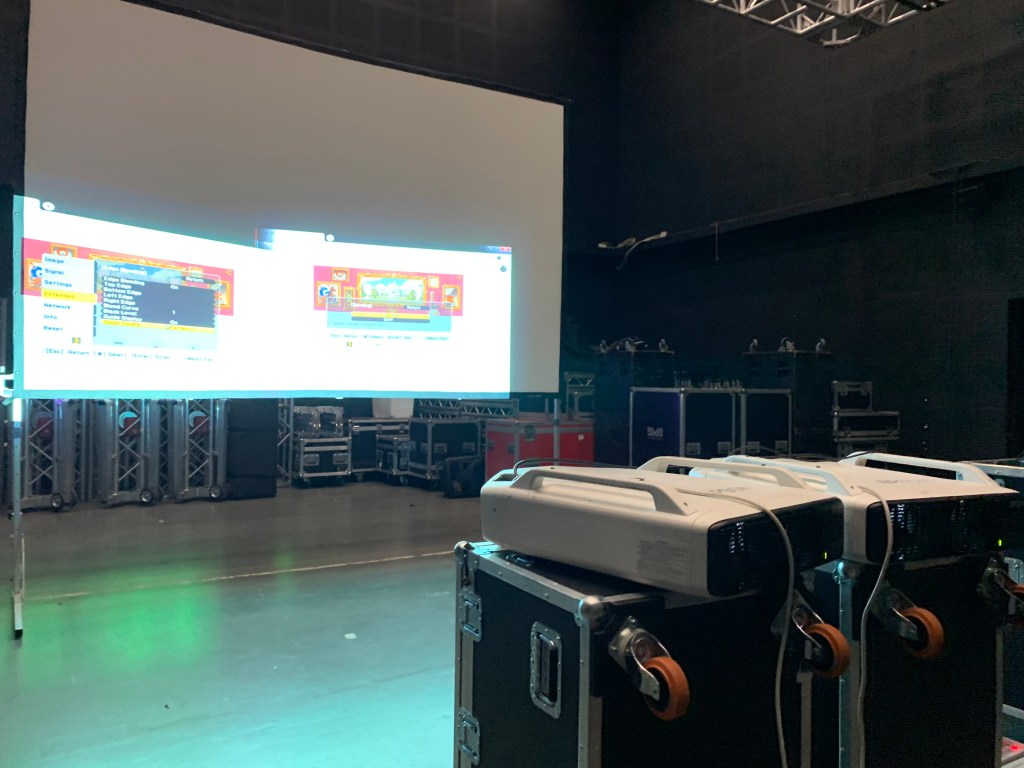
Edge blending is today pause for thought – This follows well from projector stacking covered in a previous blog after all, it is much of the same fine detail adjustment but this time we achieve different results with very much the same side by side setup. Edge blending is a way of creating a seamless wide screen using two different projectors projecting half and half of a video or desktop image. It must be noted that for this example and due to the giant ultra wide screen created the single screen was brought closer as demonstrated in the image below.
So we end up sending half an image to each projector and together they make one whole image, what a love story!
As with the projector stacking, as much manual placement as possible is key before diving into the projectors magical feature. These Epson projector are high specification and have a built in blend function and as a quick stop solution it is great but Resolume can do so much more fine tuning and for a professional application it just can not be beaten.
Resolume give the user guide lines that can be adjusted, these need to be matched up perfectly and depict the primary meet line where both image edges meet and then how much blend has been added. The image example above is a bad due to the setup not meeting requirement because of a lack in space!
This is another great tool for event companies where recreating a ultra wide screen is required without the use of expensive LED video wall.
I was extremely excited for this one but unfortunately due to work commitments I was unable to see the end result but I have some fantastic photos of the setup with my group. This exercise was all about outdoor projection onto the side of one of the University buildings and due to the actually surprisingly good conditions it meant that it was too bright to be seen and by 5pm when it was dark enough, I was off to work.
To think Ben Sams went and brought a special vehicle for the event as well!
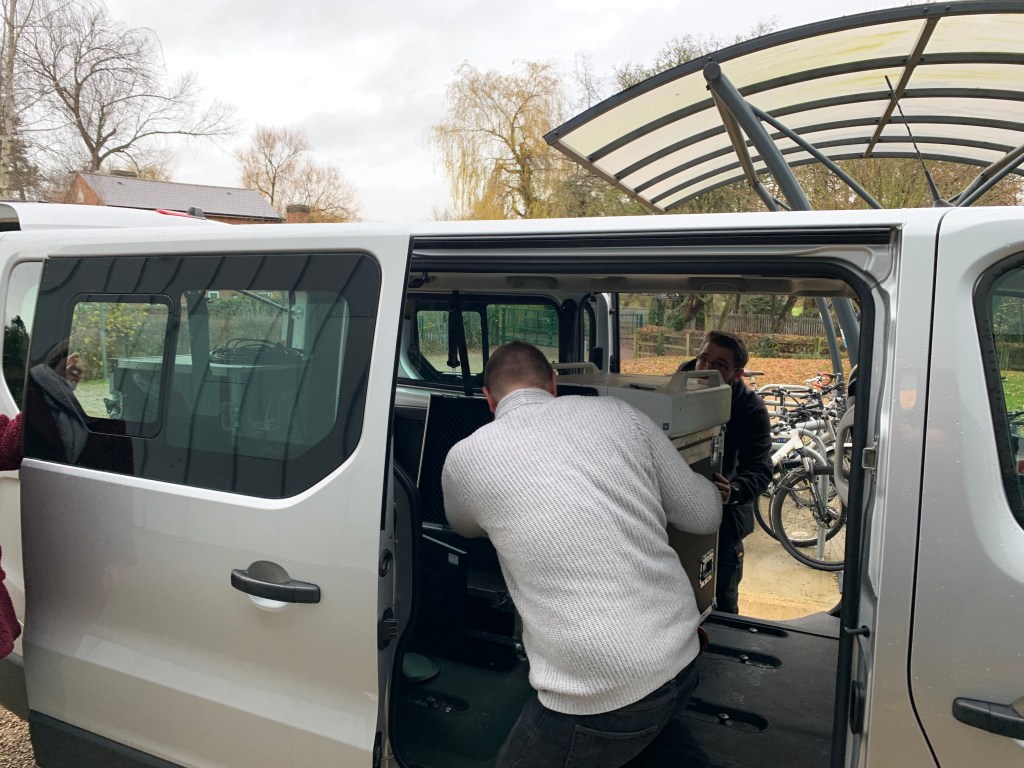
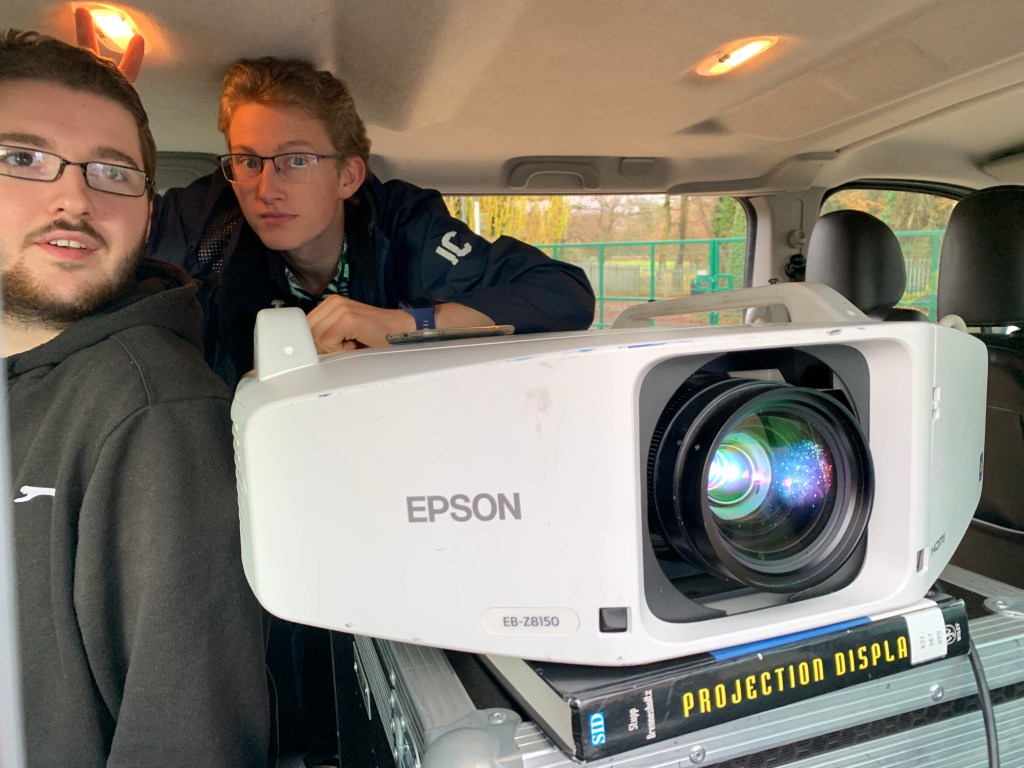
I cant really comment on the end result but the setup stage was a great success and in the beautiful sunshine, what more can you want… We started with stacking a couple of flight cases into the back of the Range Rover Sport with the projector mounted on top of these cases and then angled so the lens would project the image out of the conveniently placed cinema styled window. A control was then built around this and power ran out.
Students we’re asked to calculate a rough distance to which the Epson EB-Z8150 projector would be able to project an image that would successfully fill as much of the university building wall from the furtherest point of the car park. Once this location had been decided, Ben Sams then moved the Peugeot 5008 GT-Line into position. It must be noted that ‘Projection Displa LTD’ make a fantastic range of projector raisers, one of which is featured in the image below.
Dan Martin And Ieuan Cornish volunteered to climb into the back of the Ford S-Max Zetec to attempt to display a test pattern but unfortunately the condition were two bright to see any kind of useful image. Olivia Alsop used a piece of paper to help aid the guys to locate the correct settings within the projector.
The rest of the team safely watched and admired Ben Sams new 9-seater Volkswagen Transporter Shuttle.
Okay I have had a little joke on this one as I just was not there through the actual demonstration but on a serious note this was an excellent exercise in preparing a mapped video on Resolume Arena and putting it into practise.
I will admit, I started this blog with all the best intentions but the image caused me to abandoned my work for McDonalds on the High Street and what can only be describe as a heavenly quarter pounder with extra cheese and onions! Projector stacking is an interesting concept and for events companies it allows the gain of extra brightness, contrast, colour and a safety net back up in the event of lamp failure.
I aim to walk us through a projector stack setup while mentioning the do’s and the all important do not’s that can lead to a good effective projector stacking system… This all depends on whether your lucky enough to own two projectors!
Firstly the word stacking is basically what we are doing here but it doesn’t always have to be a stack, it could be side by side too but it must noted that this would cause the lens to be out of line resulting in possible image mismatching but it is not impossible and is an option should your projectors not stack.
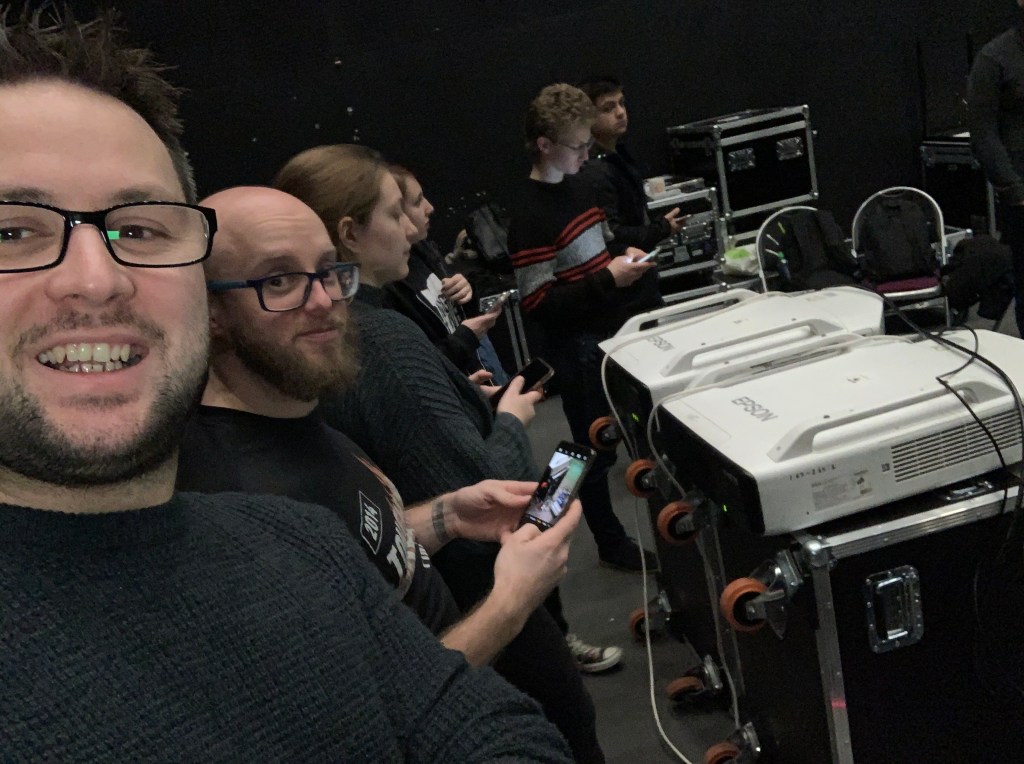
The University’s Epson projectors unfortunately do not stack and have to adopt the side by side method with some additional extra. In an ideal world they would be plastic to plastic however if that was reality then we would be blocking one of the much needed air vents so in this scenario we have to leave a small gap for air to escape. Right so we have our setup notated in the image below… You know the group of anti-socials all on their phones!!
The middle point of the projectors should be in the middle of the actual screen we intend to project onto. This stage is actually quite important, the more we can get right from physical movement of the projectors the easier the alignment process will be in the software. Unfortunately a configuration like this is very much trial and error which basically means its time consuming and this all goes back to what I was saying about stacking being a more ideal solution especially if your running your own events company!
So the projectors are aligned as much as possible by hand which means we now turn to the projectors internal software to complete the process and to be fair it easy enough to fine tune the optical side however we need to follow a couple of exciting ground rules! Pick one projector and stick with it… Basically let’s not keep flicking between both, concentrate on getting the first projector perfectly aligned with the screen.
Dave is kindly demonstrating magic corners which is one of the various way to ensure this 4:3 projector fits the 16:10 screen, you just couldn’t write this stuff! Overall it needs a bit of a polish… The alignment that is, not Dave’s head).
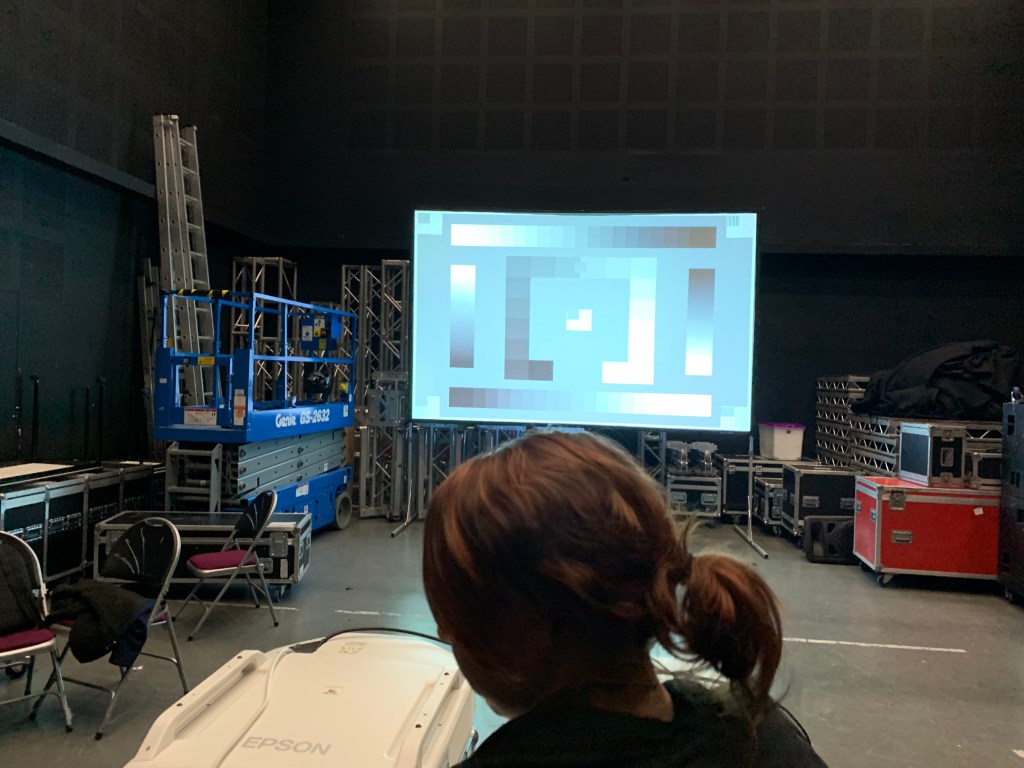
Let’s get back to the ground rules and the next is know the zoom range. The image should be central in the middle of zoom range so we have that ‘wriggle’ room when aligning the other projector to the screen. It is crucial that we use the correct test pattern, a picture of Ben Sams face is not an acceptable test pattern but the image above show a great example. Use lines… We loves lines because they give away the slightest pixel out of line. Once we are happy we can start with the other projector and this is where Len shifting and key stoning is a gift from the heavens!
The next projector needs to go through the same process after all we need it to fit on the screen the alignment stage follows after using the lens shift options. It extremely important we have some of this lovely ‘wriggle’ room in the actual lens shifting otherwise it will be pointless… Basically make sure you reset the projectors. We are done! Magic! Unless of course it doesn’t look right in which case we need to check the PC is outputting the same image, at the same resolution, at the same aspect ratio, you know the drill!
It will look squashed as the projectors are 4:3 and keystoned to 16:10 just in case you are thinking that doesn’t look quite and also how big are them ladders… Who knows but we can change the output ratio within our desktop computer software but note that it’ll be in the video not the output resolution.
So why two projectors apart from it being duller when you shutter one? Obviously we get a brighter image which means bright vivid colours however this does bring brighten dark colours meaning blacks become grey. However to increase brightness and add a fail safe into your projection system, it is an acceptable compromise in my book.
Well as I sit here listening to ‘She Bangs’ by Ricky Martin, I find it a good time to reclaim some of my manhood and explore another important aspect of video display… Projection! This blog will focus on the background details we don’t always think of when purchasing a projector as explaining the technical specifications encountered when choosing the right projector.
Now it is not everyday you are stood in PC World staring at the 60 inch TV’s and saying, ‘I want wall to wall picture’ because most of us just pop to the cinema but let’s say were building a home cinema system… What projector is best and why? How much? What do you get for your money? Most importantly will it fill my wall? Will the blacks actually be black? Will the heat produced cook the Christmas Turkey? Lets find out… Probably not the Turkey but feel free to report back if you ever try it.
Brightness measured in ‘Lumens’ but it doesn’t stop there… We need a standardisation and thats ANSI, the American National Standards Institute. This ANSI lumen is a standard calculation used to measure the brightness of the light source whether thats a lamp or the LED counterpart. The ANSI Lumen output will be at peak output, you can expect a much lower output with such setting as ‘eco mode’. It may also be the case that the colour temperate and lamp life also affect this figure (Event Projection, 2019).
Maths… I hate the stuff but unfortunately it is important we understand it as it can greatly aid us when calculating brightness for an area.
(ANSI lumens of projector/square feet of screen area) × screen gain = Foot Lambert
It must be noted that 1 foot Lambert = 3.4263 cd/m2
I do not care what anyone says, whether it is ‘oh the blinds will be closed’ or ‘ill turn the lights off’ we need to know the brightness of our image right? After all we want it to work in daylight, I’ve never brought a TV that doesn’t work in daylight so why would I want a projector that doesn’t?
Okay, so there is a small catch, The ANSI lumens refers to the measurement at the light source and not the actual final brightness at the screen. Candela is used to calculate the perceived brightness of light reflecting at a surface (Rodgers, 2016). The Candela is a luminance measurement standard and is measured in candelas per square meter displayed as cd/m2.
Resolution is a primary factor as it determines how many pixel feature in each frame displayed by the projector and it is only in recent years that projectors are now appearing for the masses in HD resolution and if you’ve got the money their are a rare few 4K for them cinema enthusiasts.
Convergence, anyone would think it is part of divergent film series but its not unfortunately. It is all about how project combines or converges three colour images together optically to create the final projected image. This is only a feature of 3LCD or DLP chip projectors where more than one lamp or chip is responsible for colour.
In this setup of projector three separate colour chips produce the images. These are created from different colour elements or panels, one for red, another for green, and finally one dedicated to blue (AVForums, 2009).
It is greatly debated on many audio visual and home cinema forum that some projectors have better convergence than others. However, there can be much truth in this especially in older projectors, the internal convergence can become degraded, resulting in some colours not properly aligning. This fault can cause ghosting of the image (NVIDIA, 2015).
We’re onto the dodgy contrast ratio and I have referred to it as dodgy for the simple fact that there is no standardised testing for this specification. It is a free for all, who can look the best figure that unfortunately we actually do need to know, just take it with a pinch of salt. This ratio is the amount of light reflected from an all white image and an all black image. A great example of this is a projector with a rough 4000:1 contrast ratio meaning that the white image is 4000 times brighter than the black image, with me so far? The higher this ratio, in theory the more detail you will see on the image. Contrast is the ability for us to see them subtle shade changes in colours (Projectorcentral.com, n.d.).
It is Alice through the lens now then, see what I did there? Pahhh I am unappreciated. Right down to business and we need to explore two key terms before we can dive into the realm of lenses and these are focal length and F-stop. Professional projectors come with a wide range of short, ultra short, medium and long ranging lenses to fit many a purpose but what does a lens actually do? Our good friends at ‘ExplainThatStuff’ define a lens as a piece of plastic or glass with a curved edge that has the ability to focus or disperse light (Explain that Stuff, 2019).
The f-stop is the top secret disguise for aperture and the photography world are used to seeing it written as f/11 or f/2.8. It refers to a specific aperture, which in turn controls how much light is allowed to pass through the lens. This can aiding in both the contrast and brightness of an image. The lower the f-stop figure, the more light it allows to pass through, this has a huge impact on the the depth of field much like on a professional DLSR camera (Cox, 2017). It must be noted that many advanced professional projectors and lenses feature automatically adjusting f-stop to insure the best contrast is always achieved.
This brings us onto focal length measured in good old millimeters for example 10-65mm and is commonly used to determine the ratio between the final image size onto the screen and the actual throw distance required to successfully project and will the screen. It is typical for specification to identify the f-stop as a figure over the whole focal length of a specific lens. An example of this would be “50–75mm focal length you might have a f2.0–2.6 f-stop range.” (Sams, 2019).
Focus the most simple feature set for any projector whether it be manual or automatic, in both scenarios the focus is achieved by rotating the Lens. The addition of an ultrasonic sensor that measures the distance to the screen to automatically focus to a sharp crisp image (Lander, 2019).
Other consideration that I personally feel are slowly become a ‘don’t need to worry about’ specification due to advances in technology are as follows… Noise level, okay yes fans are loud but most use sensors that carefully monitors temperatures to ensure reduced noise level. Lamp life, with the advent of laser and LED these figures depending on usage could mean the lamp or diode will outlast you!
Aspect ratio is commonly 16:9 with a couple of 16:10 thrown out there to confuse us but it is rare to see a new projector boosting 4:3. Just ensure you match to the screen. DLP is a huge player these days for lamps but if you can afford it go laser. Brands like Epson, NEC, Optoma, Panasonic are at the forefront of projection technology and their prices are falling fast due to newer high definition, ultra thin TV and LED walls become more popular and affordable to hire.
Cox, S. (2017). What is F-Stop, How it Works and How to Use it in Photography. [online] Photographylife.com. Available at: https://photographylife.com/f-stop#what-is-f-stop [Accessed 30 Nov. 2019].
Explain that Stuff. (2019). How do lenses work? | What are the different types of lens?. [online] Available at: https://www.explainthatstuff.com/lenses.html [Accessed 30 Nov. 2019].
Hello and welcome to another thrilling video blog, a huge shout out to our number one reader Ben Sams! – Okay let’s get serious, I recently posted about Multi-Faith week at the University of Derby and the projection display myself and a group managed as part of that. I also spoke about a number of issues that could have been addressed in order to some what improved the whole display and impact for the audience. One of these being a lack of knowledge with the Resolume Arena application, so today we’ve going to explore Resolume. The blog will give a basic overview of feature because let’s be honest, I’m not selling you the product but we will cover some practical aspects in controlling multiple screens through a visualisation software called Capture!
Firstly Resolume and Capture application were launched on the University’s local network, an iCloud based application was running to allow a virtual network to be established between applications. While video files were imported into Resolume, it was important to boardcast through Resolume which require the IP address of the desktop computer sending the information and then the receiving IP address to link the programmes. In this case this was a virtual PC within a physical desktop computer,
At this stage the stream from Resolume is then picked up using Capture via NDI. Capture had a pre patched room layout for multiple LED walls. We then used Resolume to display an accurately mapped video across these different screen that looks in theory like one whole screen but how is this done?
Slices… No, not of bacon but on that note, i’ll add it to the shopping list! – Slice are virtual screens within one single screen. An output screen can have many slices all being able to output themselves. We adjust and warp each slice to represent slice a single screen in Capture’s recreated in the room. This allows us to map a single video onto multiple LED walls while still maintaining the size of the original video/screen.
A composition is the term for the whole project you are creating and editing throughout. A & B crossfaders allow the switching of video content ‘DJ style’ between different videos loaded to either A or B cues. You can trigger clips as per the image below by clicking on the thumbnail.
A number of video effects can be applied to the any video including but not limited to chroma-key, colour pass, wrapping, time-lapse, contrast and brightness setting, add and subtraction of colours and elements within the video. Resolume is a fantastic piece of software far ahead of the competition (Resolume.com, 2019).
Amidst the Batman Pun there is a serious topic at hand… Bitrate! How can we talk about streaming and not about Bitrate, It is like Marks without Spencer, John without Lewis, Boots without… erm… Well you get the idea!
Bitrate by definition is the rate at which we transfer bits of data and is commonly measured in bps, ‘bits per second’. An example of this would be 80kbps (the k being kilo) but this bitrate figure can also describe video and audio compression rates! For example when we talk about an MP3 files compressed down to 128kbps vs 192kbps we note in theory the dynamic range between the two audio files will be different with 192kps having a greater dynamic range (Techterms.com, 2018).
Okay but thats audio what about video? How is it so crucial we look at bitrate? Well lets take a random person… Olivia for example, she just download her favourite film ‘Love Actually’ in high definition quality with a bitrate of 1200kbps because it takes up less space on her tiny Solid State Drive (SSD). However her boyfriend, let’s say James has been a bit more clever and downloaded a larger file size still HD quality but with a bitrate of 4000kbps because he is using an external hard drive. Upon previewing the quality of the higher bitrate seems much better but they are both HD 1080p? Whats happened?
Simple, the more data the more higher the bitrate and in turn the higher the bitrate the more data within the video, IE resolution, FPS, aspect ratio, audio quality (Filmora.wondershare.com, 2016).
What about when we stream, how does bitrate affect video quality? Yeah we have talked mostly about video file bitrates but in all honesty the principle is the same when we stream media over the internet with the added addition of internet speeds and bandwidth, We may be served a HD quality video over say Netflix but at a lower bitrate that doesn’t exceed our connection bandwidth. This all links back to HTTP Streaming and the good old… well new adaptive streaming servers we talked about a few weeks ago!
It is multi-faith week at University of Derby and as part of this, the Multi-faith centre hosts it own open day inviting student to use the vast facilities on offer. As part of this an outdoor projection system as well as a small audio setup (not that we care about them noise boys!!) will be installed to show case a presentation of images from around the world related to Pilgrimage. As part of the VSDT model this was combined with a series of high quality moving images aimed to enhance the display. It must be noted that the legendary Ben Sams downloaded these motion images from VideoBlocks.
Epson EB-Z8150 projector, displaying onto the main curved wall of the multi-faith centre.
This gathering had a team of three people including myself, above is an image of the setup onto the curved wall. An additional projector was placed on top of a static vehicle projecting onto a flat surfaced wall. It was decided that control would be put inside a car parked around the back of the centre due mostly to expected bad weather conditions. It must be noted this made aligning the main projector on the curved wall extremely difficult in Resolume Arena, however it proved a good move in ensuring no distraction or blocking off of the moving images and presentation.
Second Epson projector displaying the powerpoint onto a flat surface at the back of the centre.
The projector running the powerpoint seen in the above image along with the control setup worked nicely. A trial run of this project was completed but due to massive over sights with the PC we thought had Resolume Arena installed, it meant that as a group we could not do much. I think if the trial run had been a success, the extra time would have lead to a better projection coverage of the curved wall and probably a bigger coverage area for the second car mounted projector.
A screenshot of Resolume Arena.
The actually event ran pretty well considering the weather but what has been learnt from this type of setup and was it really a professional finish? It is actually this type of project that at first glance appears fairly easy but becomes a huge beast even when everyone contributes well and pulls together. Weather conditions and projectors surprising do not mix, trust me… I have tried underwater projection, thats a PC World return I don’t want to do again. This all being said the delivery of a fantastic visual experience that the client seemed very impressed with was achieved!
I think the biggest thing I have learnt is how complex and powerful Resolume can be, it is so much more than a simple VDJ and Media Server. That is where a better understand of Resolume would have dramatically saved time while also increasing the overall impact and realism of the projection. The black slices inserted to cut the video off around around the edge of the wall were rushed and lets face it, it looked rushed and a lack of understanding on everyone part made it a poor effect. I have therefore decided that we will dedicate a blog to Resolume to give a better understanding of it’s use.
Finally I think the second projector should have been placed in such a way (further back down the driveway) to give a larger better seen and bigger impact of display and let’s be honest, its a quick and easy fix. This all being said, the high quality moving images matched this the powerpoint worked very well but it must be noted that we had no idea how to automate the changing videos to link with the powerpoint timings which meant poor Olivia Alsop had to sit selecting each video as the slides changed – God bless her I say!
This is a quick one regarding a great example of adaptive streaming technology that has been adopted by most if not all streaming services, it just happens I am a massive Friends fan, so Netflix it is!
Now if you are like me, you are unfortunately stuck with boardband at a less than satisfactory connection speed that even my little 1.0 Volkswagen Up! could out perform… However adaptive streaming to the rescue.
It is this HTTP protocol service that allows the video to be delivered to my screen in the most efficient way possible to ensure smooth and good video quality. It become evident as I start my favourite episode of Friends “The One Where Ross Moves In” that the video quality was indeed awful, blocking and blurry but within a few seconds as my bandwidth settled down and the streaming server learnt my connection speed, the picture quality improved as I am served with a higher bitrate video (Bitmovin, 2018). In fact after roughly a minute or so, I am probably at HD ready quality which might as well be standard definition on my UHD 4K LED backlight TV!
This all being said and jokes aside, this is actually a great example of adaptive streaming that we all benefit from but do not always appreciate.
References
Bitmovin. (2018). Adaptive streaming – a simple explanation of how it works. [online] Available at: https://bitmovin.com/adaptive-streaming/ [Accessed 2 Nov. 2019].
Streaming servers are todays topic of conversation, especially now as we understand how HTTP streaming works and have touched on adaptive video. Streaming servers like Wowza or Plex to name a few are the future of all video content.
Streaming servers have a number of complex functions that allow us endless amounts of media enjoyment. They encode large media files into many files all with various bitrates to suit a number of devices ensuring maximum compatibility (THG Hosting, 2019). All this video data gets to you using our favourite protocol… HTTP which deals with hypertext, basically everything you surf the internet looking at. Remember it is all about transferring data in real time hence the RTP protocol.
What choices do we have when it comes to streaming then? Well an On-Demand service like a live boardcast require special equipment at the source to encode and transmit to the user in real time via satellite and then we have unicast services such as Netflix where each person watching gets their own stream to pause, fast-forward and rewind as they see fit (HowStuffWorks, 2018).








 Video Streaming & Display Technology Blog